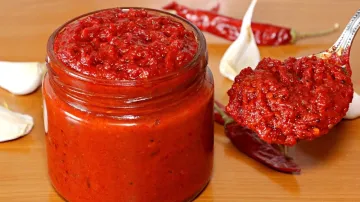
Garlic chutney, with its robust flavour and spicy kick, is an essential accompaniment for many Indian snacks. This simple, step-by-step recipe will guide you through making this delectable chutney at home. Whether you're enjoying samosas, pakoras, or dosas, this chutney will add an extra layer of flavour to your favourite treats. Here's a step-by-step recipe to try your hands on:
Ingredients:
- 10-12 cloves of garlic
- 1/2 cup of grated coconut (fresh or desiccated)
- 4-5 dried red chilies
- 1 teaspoon cumin seeds
- 1 tablespoon lemon juice
- Salt to taste
- 2 tablespoons water (adjust as needed)
Instructions:
1. Prepare the Ingredients:
- Peel the garlic cloves.
- If using dried red chilies, soak them in warm water for about 10 minutes to soften them.
2. Roast the Ingredients:
- In a small pan, dry roast the cumin seeds until they become aromatic. This usually takes about 2-3 minutes. Set aside.
3. Blend the Ingredients:
- In a blender, add the peeled garlic cloves, grated coconut, soaked red chilies, roasted cumin seeds, and salt.
- Blend all the ingredients until you get a coarse paste. You may need to stop and scrape down the sides of the blender a few times to ensure everything is well combined.
4. Adjust Consistency:
- Add the lemon juice and water to the blender.
- Blend again until the chutney reaches your desired consistency. If you prefer a thicker chutney, use less water; for a thinner consistency, add a bit more water.
5. Taste and Adjust Seasoning:
- Taste the chutney and adjust the salt or lemon juice as needed. The lemon juice not only adds a tangy flavour but also helps preserve the chutney for a longer time.
6. Serve and Enjoy:
Transfer the chutney to a serving bowl. It's now ready to be enjoyed with your favourite Indian snacks.
Tips for Storage:
- Refrigeration: Store the chutney in an airtight container in the refrigerator. It will keep well for up to a week.
- Freezing: For longer storage, you can freeze the chutney in small portions. Thaw it in the refrigerator or at room temperature before use.
This spicy garlic chutney is a versatile and flavourful condiment that enhances the taste of any snack it accompanies. With its simple preparation and bold flavours, it’s sure to become a staple in your kitchen. Try this easy recipe today and bring a burst of flavour to your snack time!
ALSO READ: Eid al-Adha 2024: Biryani to Seekh Kebabs, 5 lip-smacking mutton dishes to add to your Bakrid feast
